
4
You flip the wall switch expecting the familiar, aggressive whir of your kitchen disposal, but instead, you get a dull, vibrating drone. Nothing grinds, water lingers in the sink basin, and leaving the switch on for more than a few seconds fills the air with a faint scent of hot electrical wiring. That low hum is one of the most common plumbing headaches in modern kitchens, and while it sounds ominous, it rarely means you need to buy a brand-new appliance.
In most cases, the hum is actually a good sign: electricity is flowing to the motor, but a rogue bone, a jammed piece of silverware, or an accumulation of fibrous food scrap has wedged itself between the shredder ring and the rotating flywheel. The motor is trying to turn, but physical resistance is holding it hostage. Resolving this issue does not require an expensive plumber call, but it does demand a methodical approach. Working with an appliance that combines high-torque motors, sharp shredding elements, and household plumbing requires strict safety protocols before anyone touches a tool.
Why Your Disposal Hums Instead of Spinning
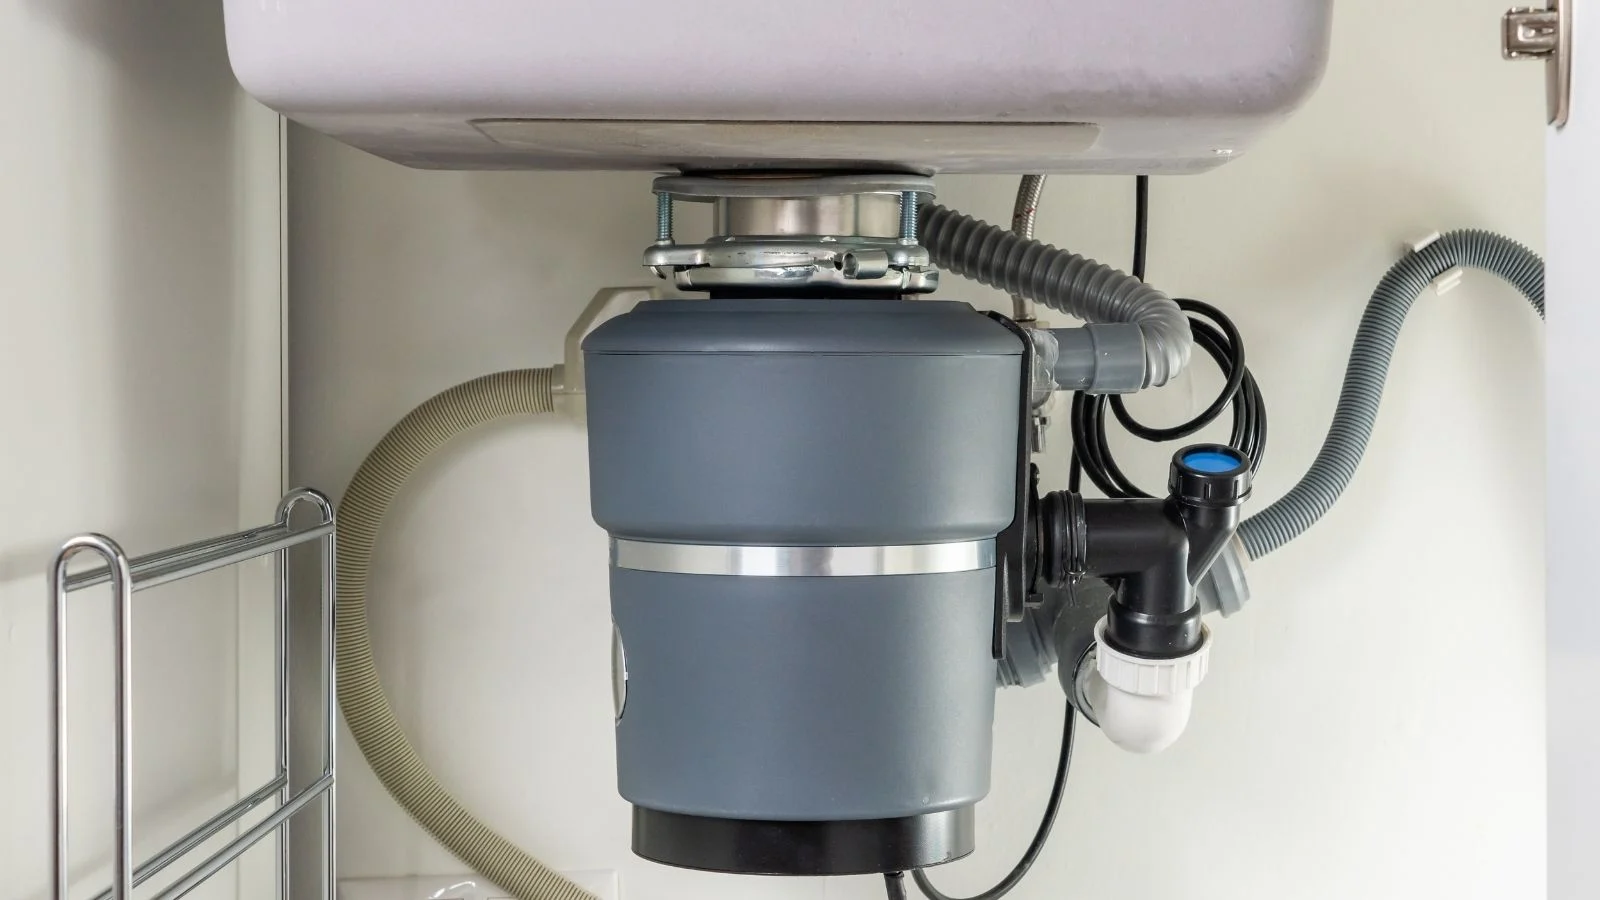
Before reaching beneath the sink, it helps to understand what is physically happening inside the canister. Inside the grind chamber sits a heavy circular metal plate known as the flywheel. Attached to this plate are swivel impellers—small metal lugs that sling food waste outward against a stationary, serrated shredder ring lined along the chamber walls.
When you turn the disposal on, an induction motor beneath the basin spins the flywheel at speeds generally between 1,700 and 2,800 RPM. If a rigid object slips between the edge of the spinning flywheel and the stationary ring, the plate grinds to an immediate halt. Because the electrical circuit remains closed, alternating current continues surging through the motor windings. The motor cannot overcome the physical wedge, producing an audible 60-hertz electrical hum.
Leaving the disposal humming for more than five to ten seconds is a mistake. When an electric motor is locked, it draws excessive current—known as locked-rotor amperage—which causes the internal copper windings to heat up rapidly. To keep your kitchen from catching fire or the motor from melting down, modern disposals are equipped with an internal thermal overload switch. This safety mechanism trips the circuit and shuts off power to the unit before permanent damage occurs. If your disposal was humming a moment ago and suddenly went silent, the overload switch simply did its job.
Absolute Safety Rules Before Starting Repairs
Household disposals are safe when handled properly, but treating them with casual indifference can lead to severe lacerations or crushed fingers. Plumbers and appliance technicians adhere to one non-negotiable rule: never insert your bare hand or any tool into the grind chamber while the unit is connected to electrical power.
Turning off the wall switch by the sink is not enough. Wall switches can be bumped accidentally by a family member, or a faulty dual-switch setup could retain voltage. To safely isolate the machine:
First, locate the power cord beneath the sink and unplug it directly from the wall outlet. Disconnecting the physical plug provides complete certainty that the unit cannot energize.
Second, if your disposal is hardwired directly into a flexible conduit without a visible plug, walk to your home electrical service panel. Locate the circuit breaker labeled for the garbage disposal or kitchen small appliances, and flip the breaker handle into the full Off position.
Third, verify zero electrical energy. Walk back to the sink and flip the wall switch on. The disposal should not hum, click, or make any sound whatsoever. Once you have verified that the power is dead, turn the wall switch back to the off position before beginning the mechanical repair.
Method 1: Freeing the Jam from the Bottom Hex Socket
Most garbage disposal manufacturers—including InSinkErator, Moen, and Badger—build an ingenious manual override directly into the bottom exterior of the housing. This feature allows you to break jams without ever reaching into the drain opening.
Locating the Hex Socket and the Proper Key
Crawl beneath the kitchen sink with a flashlight and look at the bottom center of the disposal canister. In the center of the base plate, you will see a small, recessed hexagonal hole measuring 1/4 inch across. This socket connects directly to the lower end of the main motor drive shaft.
When your disposal was installed, it likely came with a small, angled silver tool called a jam buster wrench or hex key. If you threw that away years ago, do not worry: a standard 1/4-inch Allen wrench (hex key) from your home toolbox fits the socket perfectly.
Manually Rotating the Shaft
Insert the short end of the 1/4-inch hex wrench firmly into the hexagonal socket on the bottom of the unit. Ensure the tool is seated deeply so it does not strip the socket corners under pressure.
Grip the wrench and apply steady, deliberate rotational pressure in one direction. If the jam is stubborn, you will encounter immediate resistance. Do not yank or hammer on the wrench; instead, apply firm pressure, then reverse direction and turn the wrench the opposite way.
Rocking the shaft back and forth forces the internal flywheel to move backward away from whatever object has wedged against the shredder ring. As you pivot the wrench back and forth, you will feel a sudden release of tension. Continue turning the wrench until you can rotate the shaft a full 360 degrees smoothly in both directions without any catch or drag. When the shaft spins freely, the mechanical lock is broken.
Method 2: Clearing Jams from Above with a Wooden Leverage Tool
Some older models, budget units, or select imported brands do not feature a hex socket on the bottom casing. Alternatively, tight plumbing configurations or deeply recessed cabinetry may prevent you from getting an Allen wrench underneath. In these scenarios, you can free the jam from the top of the sink using a wooden tool.
Choosing the Correct Leverage Tool
Never use metal screwdrivers, pry bars, or steel pipes inside the disposal chamber. Metal tools can gouge the stainless steel flywheel, shear off the swivel impellers, or crack the cast grind ring, permanently ruining the machine.
Instead, use a sturdy wooden implement. A cut wooden broom handle, a thick wooden dowel, or the stout handle of a heavy wooden cooking spoon works best. Wood delivers ample leverage to loosen foreign objects while absorbing mechanical shocks without scoring metal components.
Applying Leveraged Pressure
With the unit completely unplugged and disconnected from power, shine a flashlight straight down into the sink drain. Push the rubber splash guard flaps aside to locate the circular flywheel plate.
Slide the wooden handle down through the drain opening until the tip rests firmly against one of the raised swivel impellers or against the outer edge of the flywheel plate itself. Angle the handle against the top lip of the sink drain to create a lever.
Push down on your end of the wooden handle, using the lip of the sink as a fulcrum to apply rotational force to the plate. If it does not budge, pull the wooden handle out, place it against the opposite side of the lug or another point on the plate, and push in the reverse direction. Rocking the plate backward and forward will dislodge the trapped debris just as the hex key does from below. Once the plate slides freely when nudged, the flywheel is unstuck.
Removing the Foreign Object from the Chamber
Unsticking the flywheel is only half the battle. If you immediately restore power and turn the unit back on, the loose foreign object that caused the jam will simply be caught by the rotating impellers and driven back into the shredder ring within seconds. You must manually extract the debris before firing up the motor.
Visual Inspection and Extraction Tools
Keep the power disconnected. Take a bright flashlight and peer directly through the rubber splash guard into the grind chamber.
Inspect the entire circumference of the shredder ring. Common culprits include small peach or plum pits, hard chicken bone fragments, cherry stones, coins, twist ties, or inadvertently dropped silverware like teaspoons.
Reach into the chamber using a pair of long-needle-nose pliers or sturdy kitchen tongs. Grip the object firmly and pull it straight up out of the sink drain. If broken glass caused the jam, use pliers to remove large shards, then wrap strong duct tape around the end of a wooden dowel—sticky side out—to dab against the bottom plate and retrieve microscopic glass splinters.
Checking the Swivel Impellers
While your pliers are inside, gently nudge each of the two mounted swivel impellers. These metal lugs should pivot freely on their mounting rivets. If food gunk or fibrous strings have wound tightly around an impeller base, pick the residue away so the lugs swing freely. Once the chamber floor is completely clear of loose matter, the interior is ready for operation.
Resetting the Overload Protector and Testing the Unit
Now that the rotating mechanism moves freely and the chamber is clear of obstructions, you can re-establish electrical service and reset the unit.
Locating and Resetting the Thermal Switch
Look underneath the disposal canister once again. Near the bottom edge or directly on the bottom plate—often opposite the hex wrench socket—you will find a small, square or round red button. This is the thermal overload reset button.
If your disposal hummed and then went silent before you started repairs, this red button likely popped out about a quarter of an inch. If the canister feels warm to the touch, wait roughly five minutes for the internal bimetallic strip to cool down. Once cooled, press the red button firmly upward until you feel or hear a crisp mechanical click. If the button stays recessed inside the housing, the circuit is reset. If it immediately drops back out, give the motor another five minutes to dissipate residual heat and try again.
Performing the Cold Water Test
Remove all tools, flashlights, and hands from the sink basin. Reconnect the power by plugging the electrical cord back into the wall receptacle, or switch the dedicated circuit breaker back on at the main service panel.
Before touching the wall switch, turn on the kitchen faucet and run cold water at a brisk flow rate. Running water is critical because it cools the motor bearings and lubricates the mechanical seals.
While the cold water is streaming down the drain, reach over and flip the disposal wall switch. The unit should immediately engage with a clean, smooth, roaring spin rather than a struggling hum. Allow the disposal to run empty with cold water running for fifteen to twenty seconds to flush away any residual pulverized particles downstream through the P-trap.
What to Do If the Disposal Continues to Hum
If you followed every step, confirmed the hex shaft turns 360 degrees freely by hand, pressed the red reset button, and the unit still produces an electrical hum without spinning when energized, you are dealing with one of two issues:
The first possibility is a secondary obstruction that was pushed underneath the flywheel plate during manual rotation. When debris slips beneath the plate into the lower water seal chamber, it can bind the motor under electrical load even if hand pressure turns it slowly. Unplug the disposal, insert your hex key again, and rotate the shaft vigorously back and forth through a dozen continuous cycles while running water through the drain to flush out trapped sediment.
The second possibility is internal electrical failure. When an older garbage disposal is allowed to hum for several minutes, the severe heat can cook the insulation on the motor’s starter capacitor or degrade the field windings. If the start winding fails, the motor loses the rotational torque required to start spinning from a standstill, causing it to sit locked in an energized hum regardless of mechanical clearance. If a free-spinning shaft refuses to rotate under power after multiple resets, the motor has likely reached the end of its service life, and the unit will need to be replaced.
Smart Everyday Habits to Prevent Future Jams
Unjamming a garbage disposal takes only ten minutes, but preventing jams altogether saves your plumbing system from unexpected downtime and premature wear. The vast majority of jams stem from improper food waste disposal habits.
Maintain Generous Water Flow
Always turn cold water on before you switch the disposal on, and leave it running for ten to fifteen seconds after you turn the unit off. Never use hot water while grinding food waste. Hot water liquefies fats, greases, and oils, allowing them to coat the internal components and congeal further down in your drain pipes. Cold water keeps fats solid, allowing the impellers to chop them into micro-pellets that wash away clean.
Feed Scrap in Controlled Batches
Dumping an entire cutting board full of vegetable peels or scraping three dinner plates directly into the hopper while the disposal is off creates an instant bottleneck. Turn the water on, turn the disposal on, and feed scrap gradually into the drain opening. This allows the impellers to process debris dynamically without the flywheel choking under an avalanche of matter.
Keep Problematic Items Out of the Sink
Disposals are designed for soft, biodegradable food scraps, not industrial waste. To avoid frustrating jams, dispose of the following items in your trash or compost bin instead of the sink drain:
-
Fibrous and stringy vegetation: Celery stalks, corn husks, artichoke leaves, onion skins, and banana peels contain long, tough fibers that wrap around the rotating impellers like twine, stalling the plate.
-
Expanding starches: Uncooked rice, dry pasta, and thick potato peels swell with water and turn into a sticky, dense paste that binds the shredder ring.
-
Hard animal remnants: Large beef bones, thick pork ribs, and clam or oyster shells are far harder than the metal teeth of your disposal and will bring the flywheel to a violent halt.
-
Eggshells and coffee grounds: While they rarely jam the flywheel directly, the thin membrane inside eggshells can snag on impellers, and coffee grounds form a dense, sediment-like sludge that clogs the trap right past the discharge tube.
A jammed garbage disposal sounds intimidating when it vibrates the sink basin, but it is almost always a straightforward mechanical lock that you can resolve in minutes with basic tools. By respecting electrical safety, using a hex key for leverage, clearing foreign debris with tongs, and resetting the thermal overload switch, you can keep your kitchen sink running smoothly without spending a dime on professional service calls.
